Lesson Ten: Floating Images
- Copy the gorilla to your images folder:
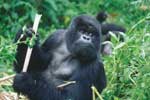
- Enter this code above the h1 tags (in your html file) to add two gorillas to your page:
<img src="images/gorilla99.jpg" alt="Gorilla">
<img src="images/gorilla99.jpg" alt="Gorilla">
Your page should now look like this (notice that the body border has expanded to enclose the gorillas and the title:
- Now you will use the float command to move the gorillas to the left and right of the title. Make these two classes in your CSS file:
floatimgright { float: right; }
.floatimgleft { float: left; }
- Call the classes in your html file by adding this code within your img tags:
<img class="floatimgright" src="images/gorilla99.jpg" alt="Gorilla">
<img class="floatimgleft" src="images/gorilla99.jpg" alt="Gorilla">
Your page should now look like this:
- To add some design add these properties to the elements and classes in your CSS file. Check your Webpage each time you add a property so that you will understand how the property affects the page: To the body element add:
font-size: large; background-color: lightgreen; }
To the floatimgright and floatimgleft classes add:
margin: 10px; border: solid 5px darkgreen; }
To the h1 element add these properties:
h1 { font-size: 300%; background-color: darkgreen; color: lightgreen; text-align: center; }
Your page should now look like this:
Lesson Eleven: Containers, Rows, and Cells